
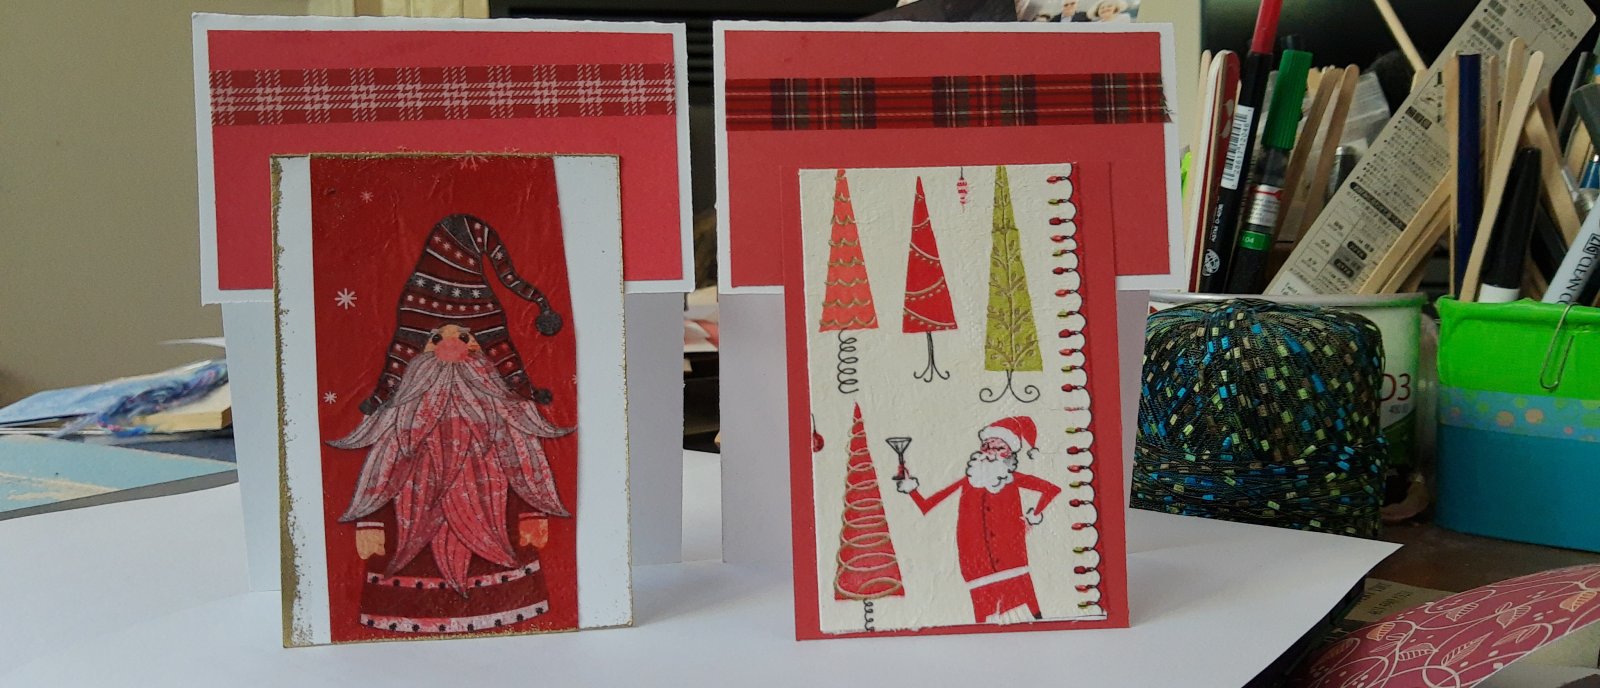
As part of our Holiday Cards for the Military initiative, the Bow Valley Calligraphy Guild is proud to create heartfelt handmade cards for military personnel stationed away from home this season. Each card in this five-part series features a unique design, hand-lettered message, and a matching envelope — crafted with love, creativity, and gratitude.
Challenge 3 of 5 – Paper Napkin Art Card
The ever-inventive Barb Fuller of the BVCG, brings us Challenge #3! Grab your festive napkins and let's reimagine them into something truly special.
Suggested Supplies
(Feel free to get creative- use what you have on hand!)
- Card Stock (8.5" x 11”) plus smaller pieces in contrasting colours
- Envelope to match card size (or handmade envelope)
- Holiday themed paper napkins
- Ribbon or washi tape
- Markers or calligraphy pens
- Small paint brush
- Glue or preferred adhesive (Mod Podge is ideal for napkins)
No glitter, confetti, or strong scents please.
Step-by-Step Instructions
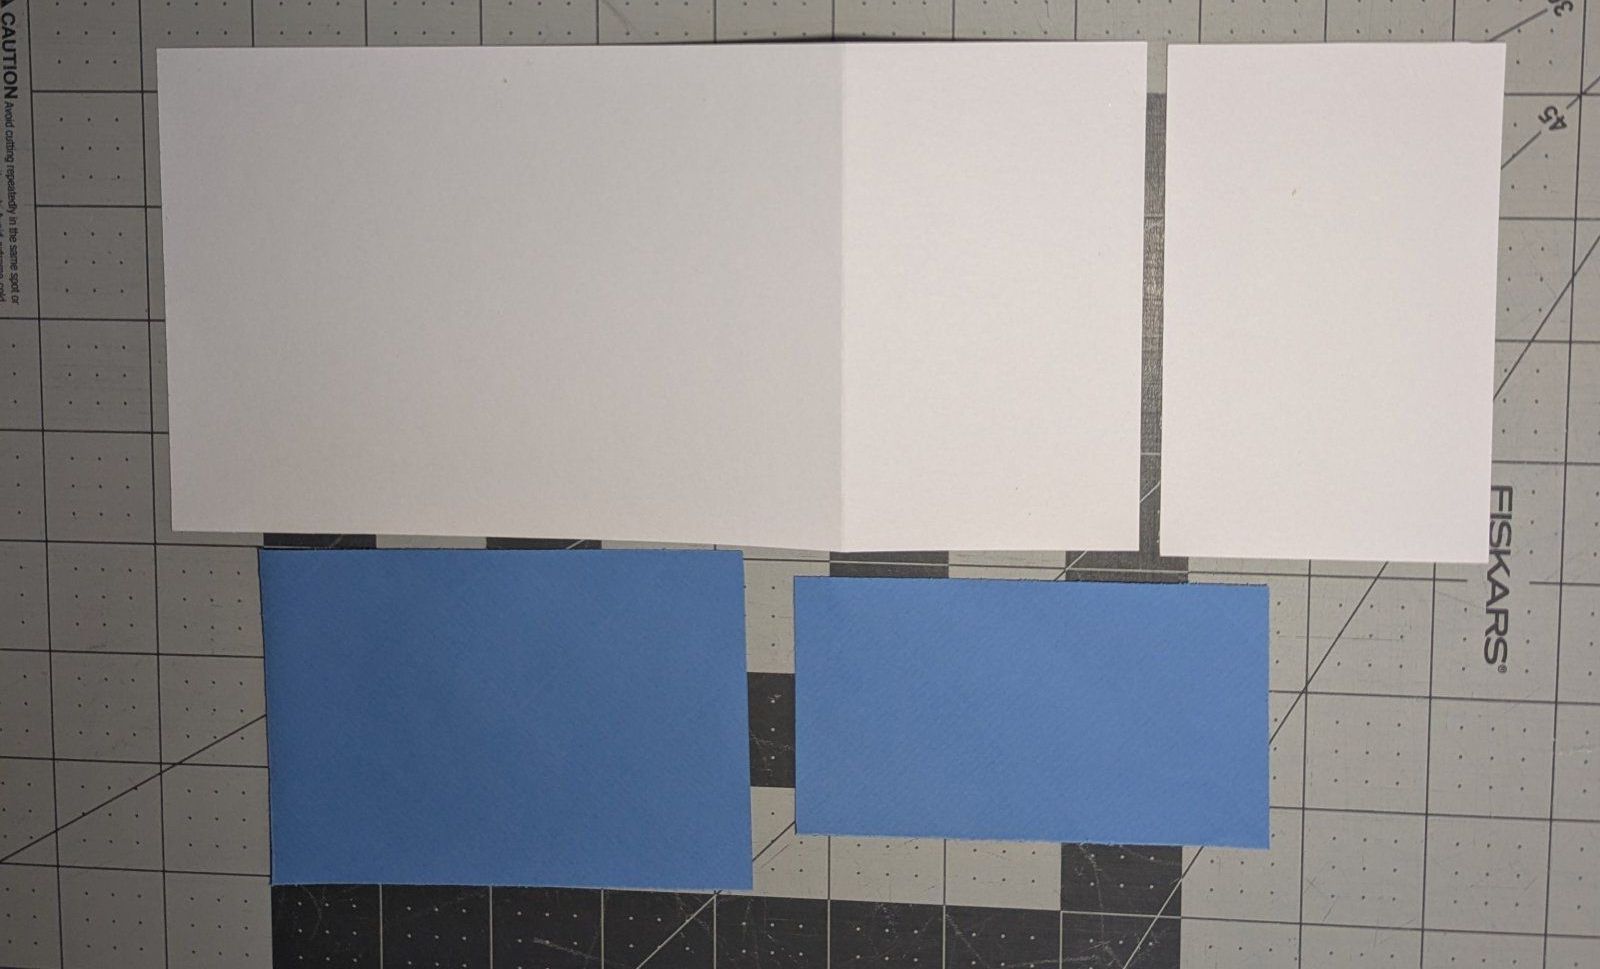
Step 1: Cut & Prep Your Papers
-
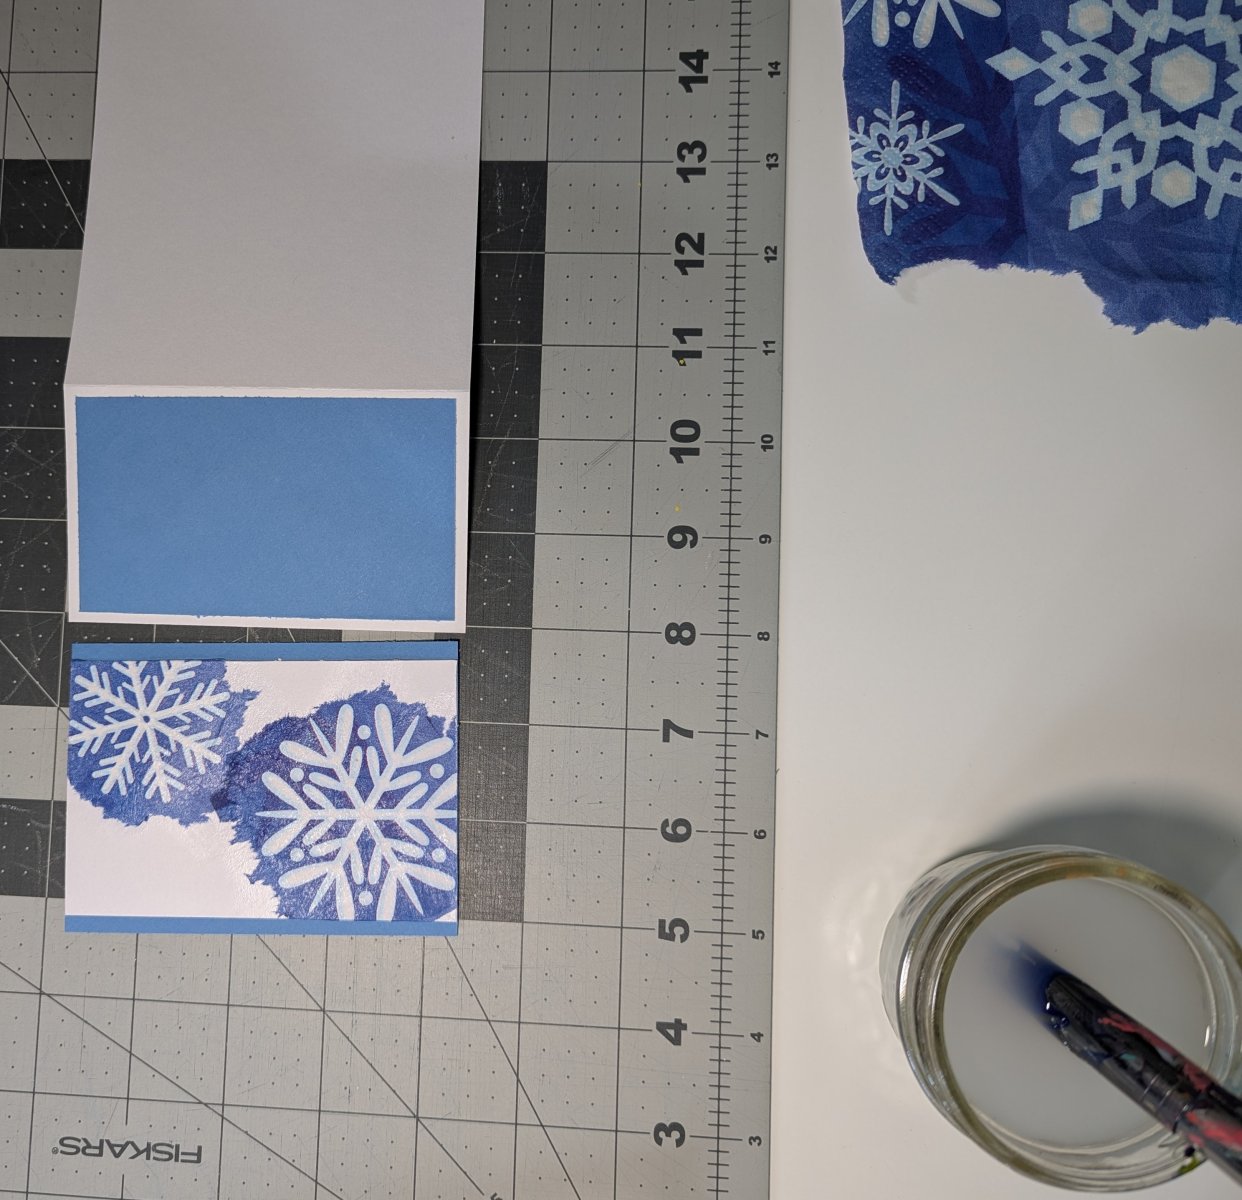
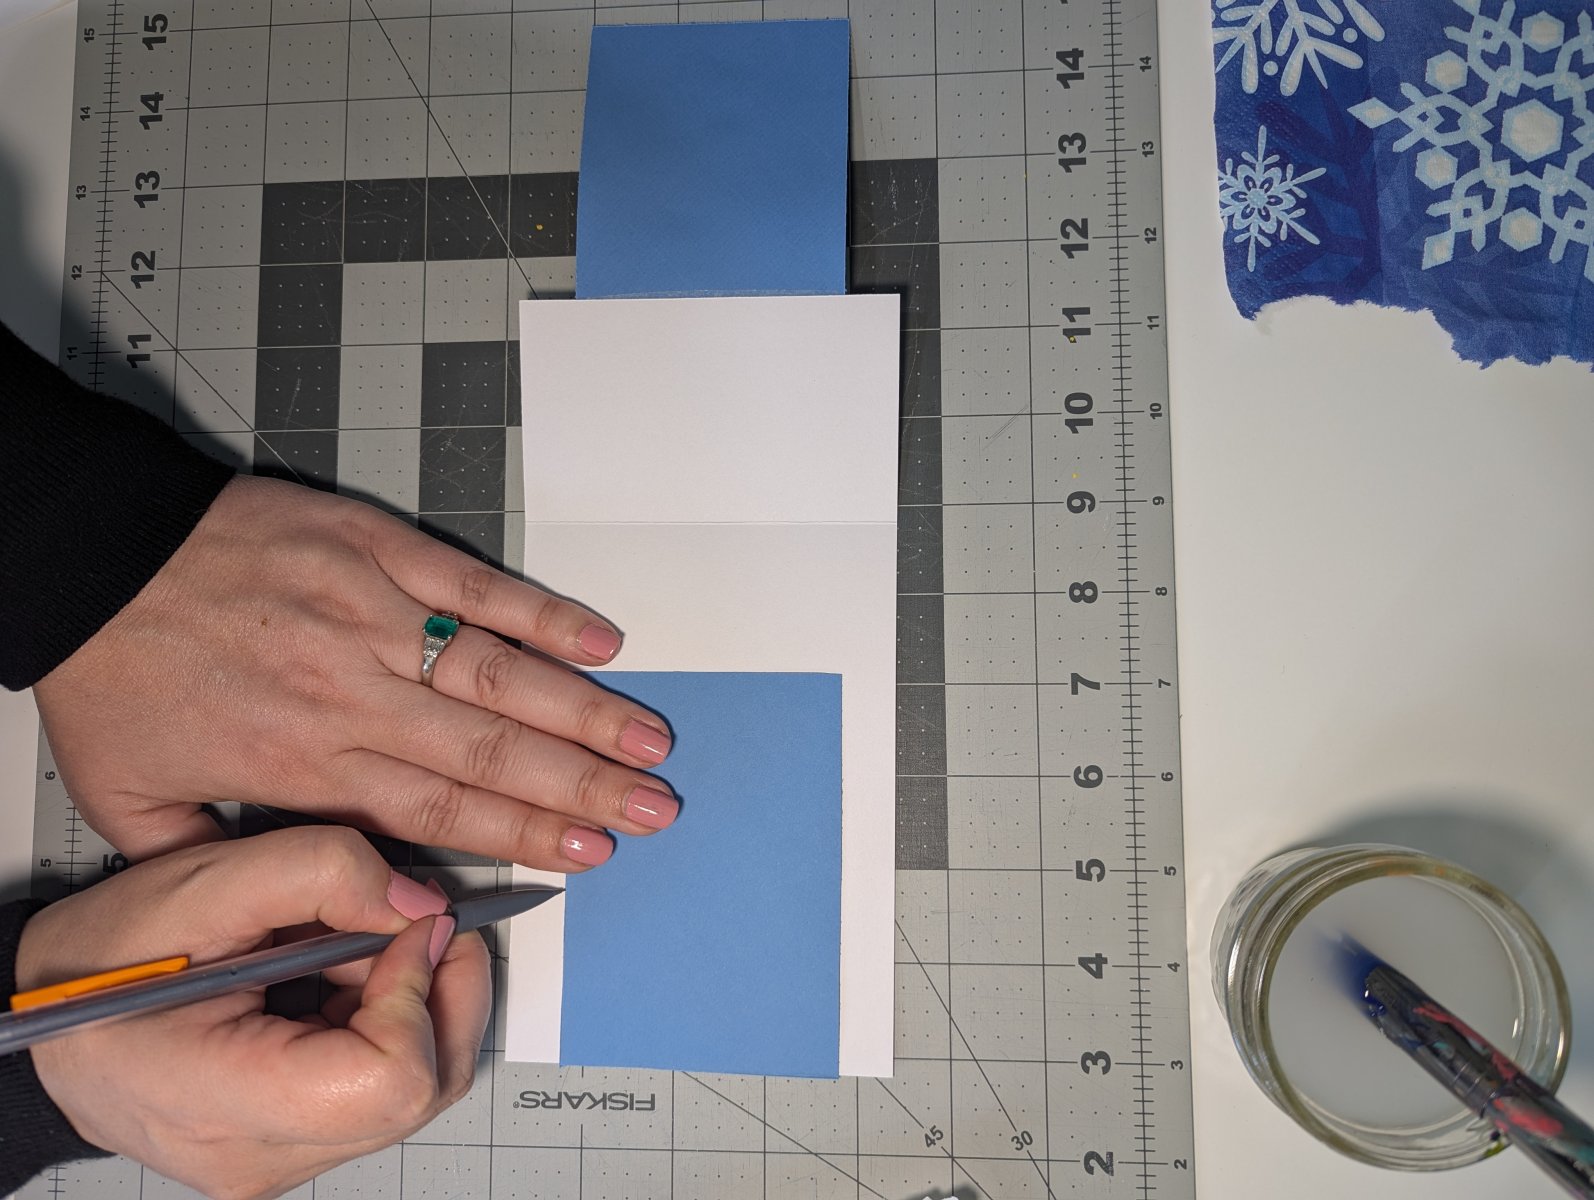
Cut cardstock (8.5” x 11”) in half (enough for 2 cards). Trim 3” from the top.
-
Score cardstock at 5.5” and fold
-
Cut a 2.25" x 4" piece of contrasting cardstock for the crossbar (horizontal "T" section)
-
Cut a second contrasting piece to 4.25" x 3" for the front panel
-
Trim leftover cardstock to 2.25" x 4" — this will hold the napkin design

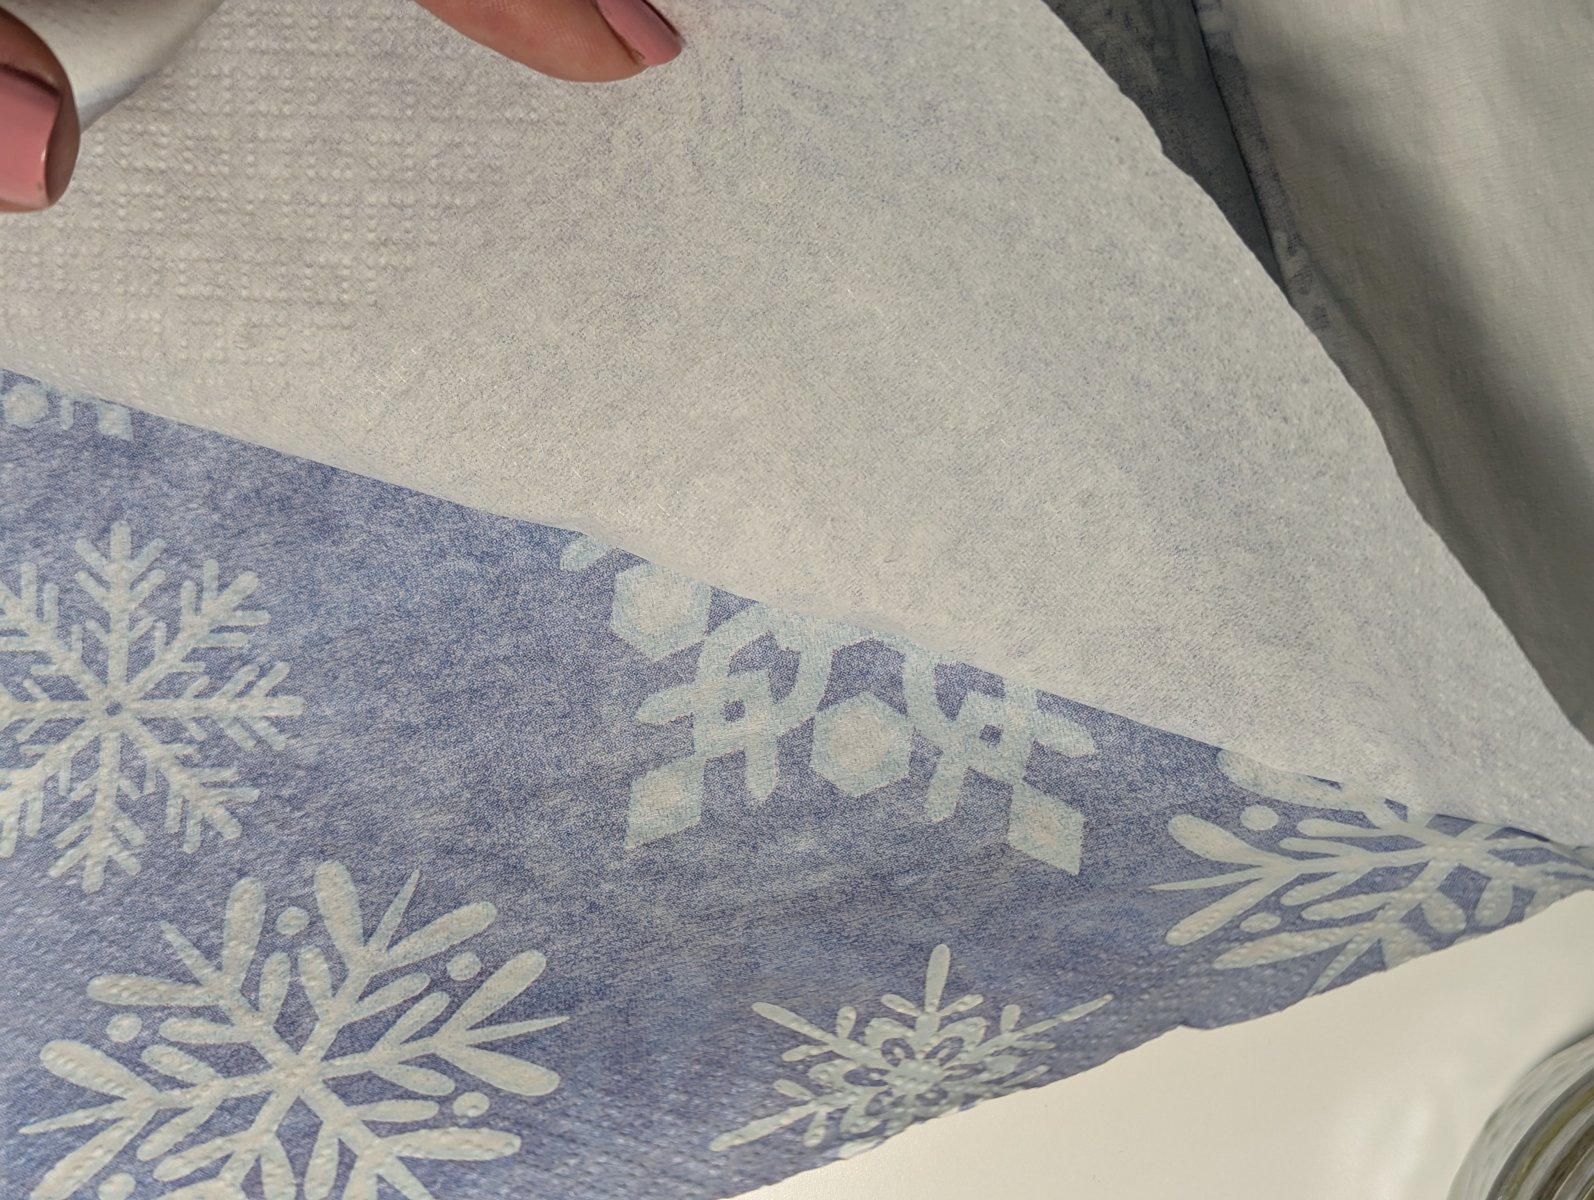
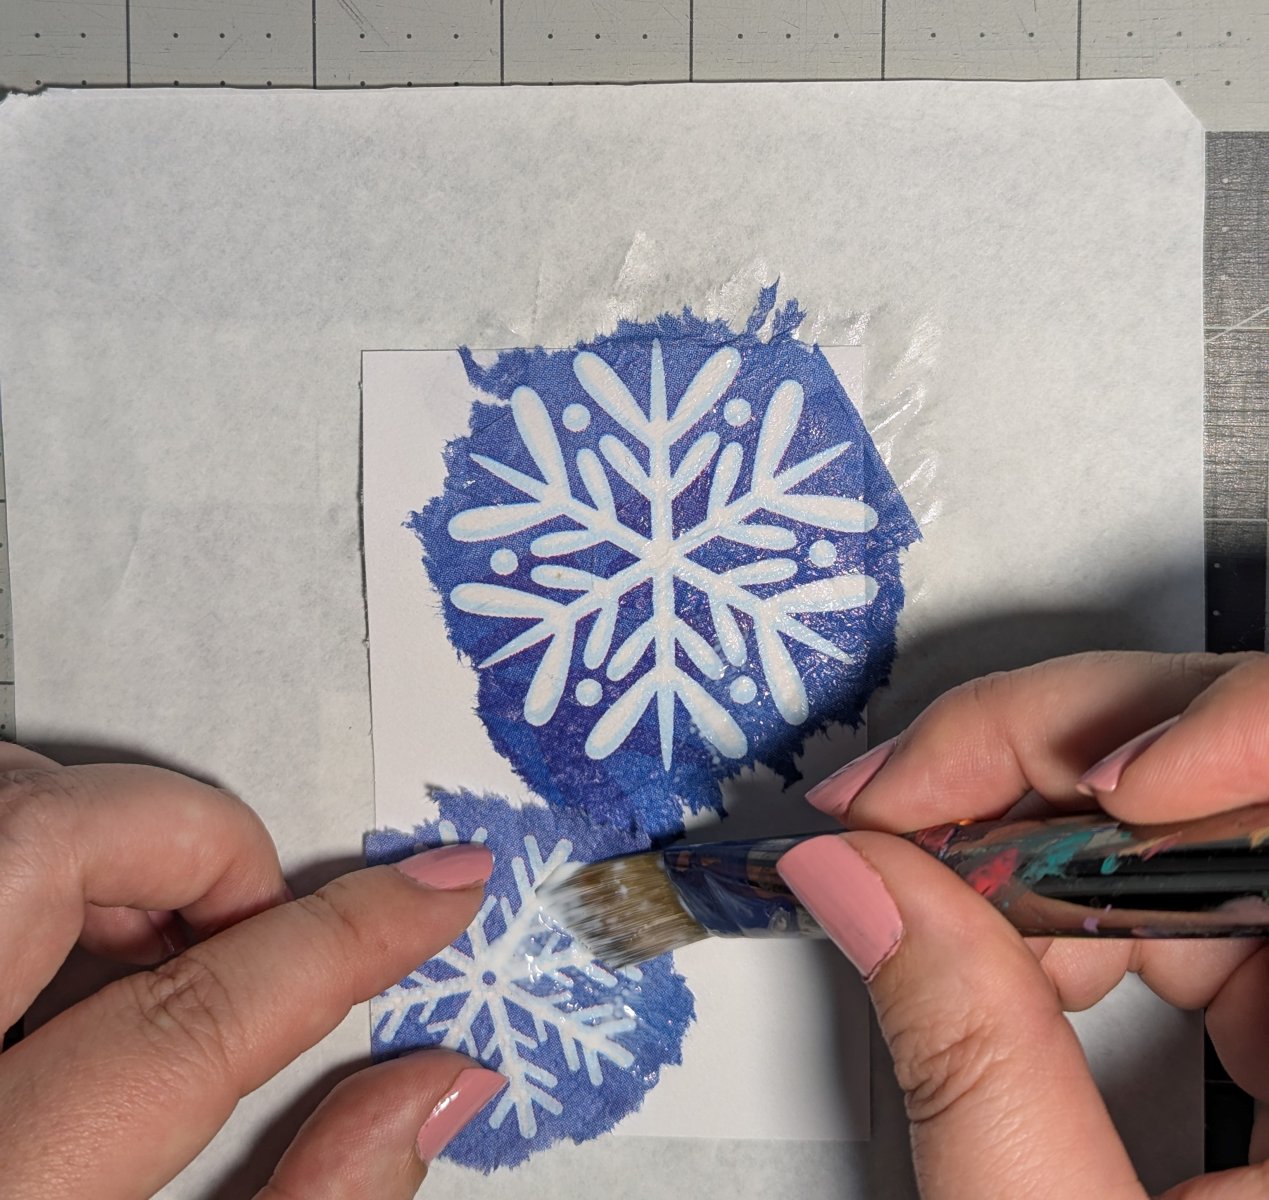
Step 2: Prepare the Napkin Art
-
Carefully separate napkin layers. (The extras still work as napkins, just not decorative!)
-
Choose your design and either:
-
Cut out the section you want
-
Or, use a small brush with water to draw a line around your chosen area — gently tear for softer edges and more control
-
-
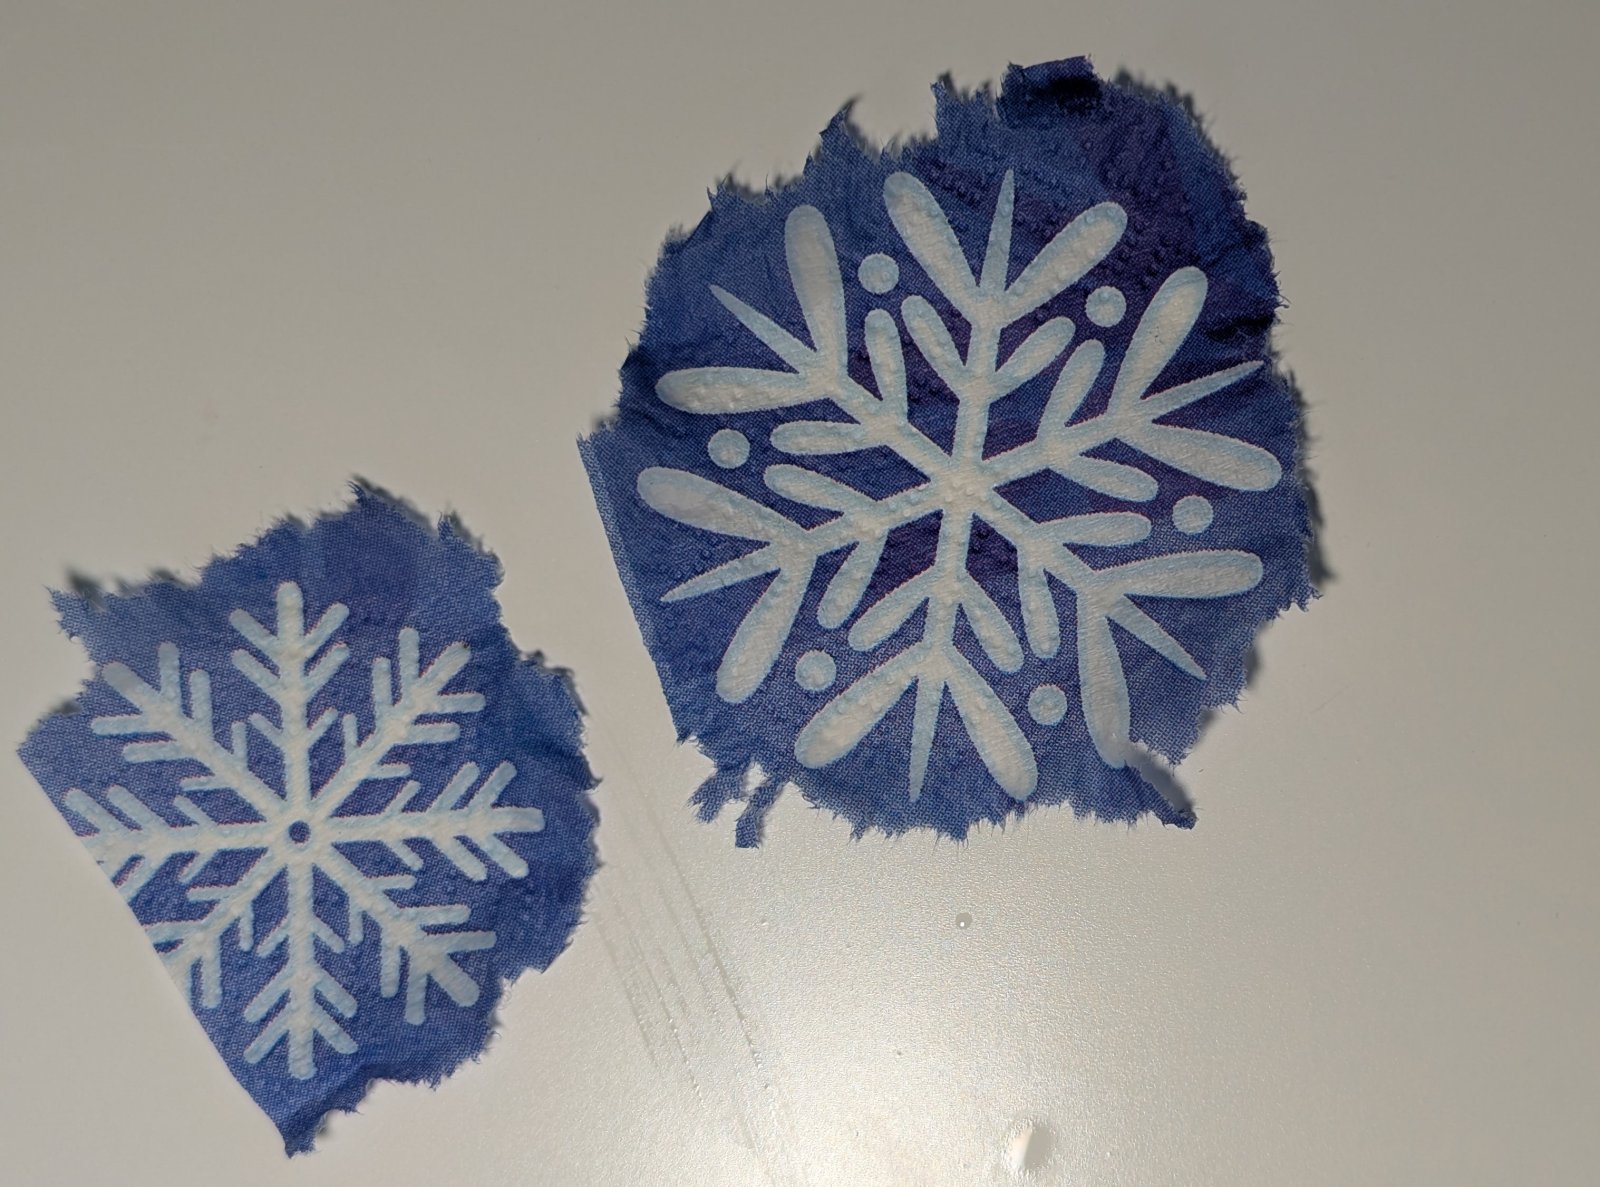
Adhere your napkin to the trimmed cardstock (2.25”x 4” piece) using Mod Podge:
-
Brush Mod Podge onto the cardstock
-
Lay napkin down
-
Brush over the napkin again to seal
-
Let dry thoroughly
-
-
Tip: White areas on napkins aren't pigment — they're transparent. That means your cardstock colour will show through. To keep whites true, mount onto white cardstock (see original card (top of article): gnome beard turns red on red backing!).
Step 3: Decorate the Card
-
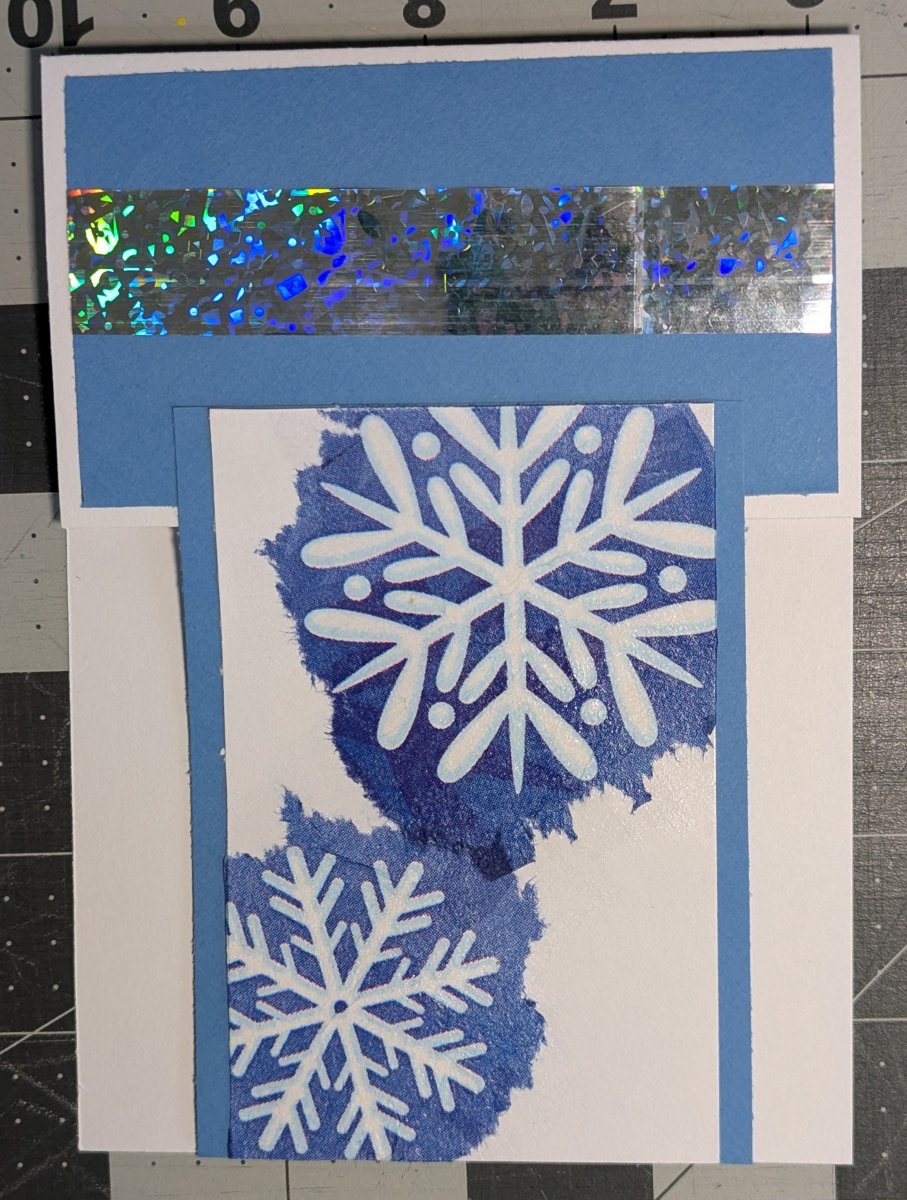
Attach the contrasting cardstock (2.25” x 4” piece) to the cross bar T section. You can add washi tape, ribbon, a greeting in this area. Add flair to the crossbar using ribbon, tape, or hand-lettered greeting. Get creative!
-
Attach the napkin piece to the 4.25" x 3" cardstock piece
-
Centre and mount this onto the card front
Step 4: Write Your Message
Lettering placement can be tricky with the “T” shape. Here’s a pro tip:
-
Use a paper guide the same size as the writing area
-
Lightly mark boundaries in pencil to keep your writing centred
-
Erase after you’re done
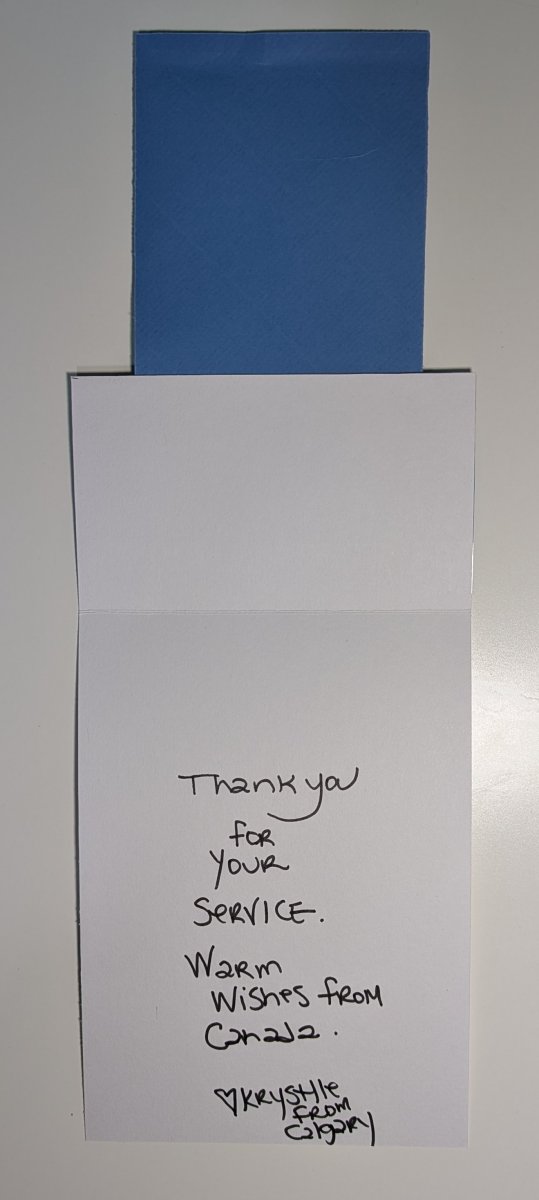
Using your favourite calligraphy tools, letter a thoughtful holiday message on the centre panel. Do sign your first name. You may optionally include "Bow Valley Calligraphy Guild member, Calgary, Canada" on the back of each card.
Popular greetings:
-
Wishing You Peace This Season
-
With Gratitude & Warmth
-
Happy Holidays from the Home Front
-
Warm wishes from Canada
-
Warm wishes from a fellow Canadian
-
Thank you for your service and warm wishes from Canada...
-
Your service is appreciated by me and by many. Warm wishes...
-
Handmade with gratitude and warm wishes...
-
Thank you for your gift of service. Warm wishes from Calgary, Canada...
-
Gratitude and warm wishes from Canada
Writing Suggestions
- Keep your tone warm, positive, and secular (e.g., “Thinking of you with thanks this holiday season.”)
- Avoid specific references to politics, religion, or combat
- Always write legibly and spell-check your message
Lynn Slevinsky, a BVCG member has graciously offered the following lettering style to use for the challenge. It is a fun, monoline alphabet that is perfect for holiday cards!
Holiday Lettering Guideline
.jpg)
Step 5: Create or Decorate the Envelope
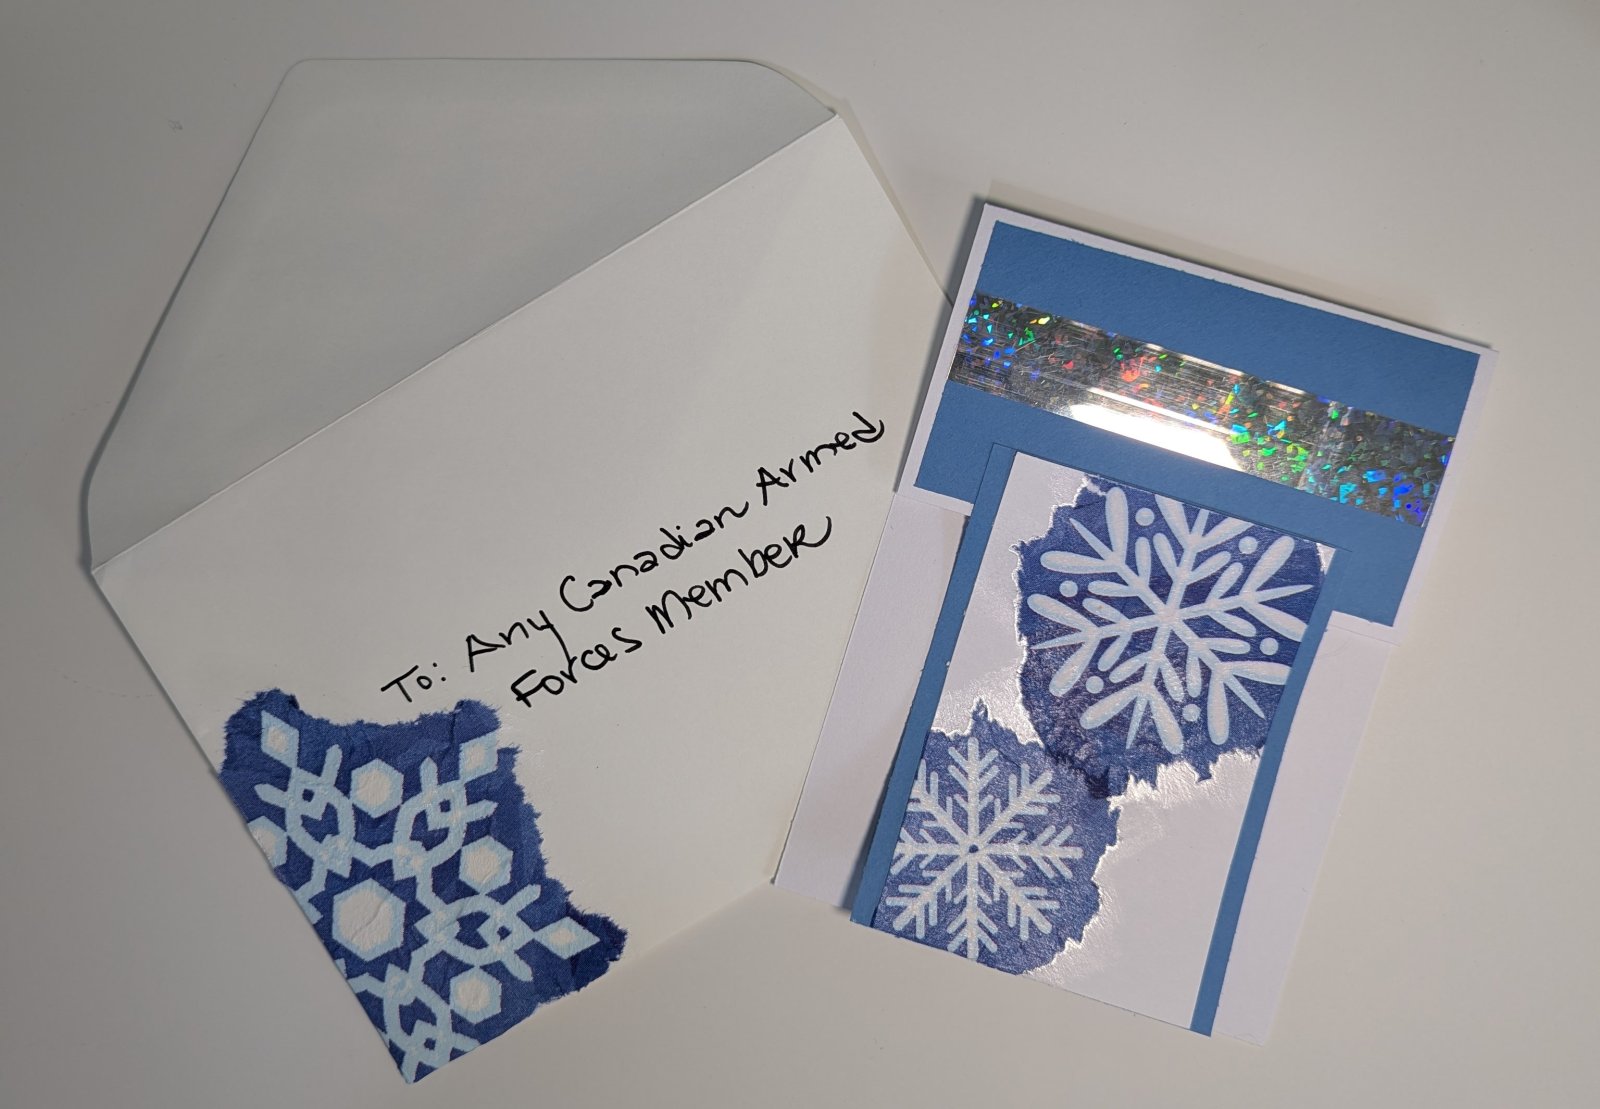
On the front of the envelope, write:
To: Any Canadian Armed Forces Member
Optional: add a border, small icon, or patriotic detail. Try adding doodles to match a design element from the recycled card (i.e. snowflakes, etc). Add an additional napkin art piece to the corner of the envelope.
Step 6: Getting Cards Ready for Drop-Off or Mailing
Stack cards gently with their envelopes — let's make mailing easy! Place each card under the envelope flap (not inside the envelope), and please don't seal the envelopes. Click here for where you can drop off or send your cards.
Share Your Work & Tag Us!
Finished your design? We’d love to see! Email us here for us to post on the BVCG's socials. Or share on your socials and tag us. Tag @bowvalleycalligraphy and use #CardsForTroops or #CalligraphyForACause
Coming Up in the Summer Challenge:
Next card design: to be released on August 12th
Stay tuned for more festive, calligraphy-friendly designs that brighten a soldier’s season!